Thursday, January 7, 2021

Dehydrated Lasagne on the Trail

What to eat on the trail? How many of us have asked that question before heading out on a multi-day trip or even a thru-hike. I hiked the Appalachian Trail on Ramen, Mac N' Cheese, Oatmeal, and Snickers bars. Yeah, it got old. By the time I hiked the Pacific Crest Trail in 2003, I started adding dehydrated vegetables to my meals, giving them a bit more nutritional content and a more complex texture. When I hiked the Continental Divide Trial in 2009, I pretty much got things dialed in, eating a dehydrated meal two out of every three nights. One of the best meals I had on trail was homemade lasagna.

Leftover Lasagna and Dehydrator
Lasagna goes in there!


Dehydrated Lasagna
Dehydrated Lasagna
Here's how I did it. Cook any lasagne recipe that you have (sometimes the boxes have a recipe on the side), and after it is finished, let it cool it down. Might as well have a slice to eat while it is warm - nothing like a freshly made lasagna. Anyway, put it in the refrigerator, and let the entire lasagna congeal. Slice it in 3/4 - 1" slices after it is cold, and then put it in a food dehydrator. The dehydration process will take about 18-20 hours, which is longer than other dehydrating other foods like refried beans or even bananas.


Now comes time to package your lasagna. I have one of those Seal-A-Meal devices, which I bought at an Albertson's in San Francisco. It works, but they are noisy, and foods that get jaggedy and sharp can puncture the plastic wrap. Yes, when dehydrating lasagne, it is important to package it carefully, so that the dried pasta does not puncture the seal. I've found that it is sometimes best to wrap the lasagne in a layer of regular Saran Wrap to soften the jagged edges from puncturing the seal-a-meal packaging. My friend, Stormy, told me that she and her partner ran their dehydrated meals through a food processor and blender to prevent punctures in their seal-a-meal wrappings. She ate what she described as "power mush,' saying that they had all the flavor, but the consistency of mush.


On trail, it is a good idea to pull out the lasagne at the beginning of the day, and add just a slight amount of water. Allow the lasagne to absorb the water, and kind of let it stew on the outside of your pack all day. Be sure the lasagna is not going to leak out its water, and furthermore be careful with how it is situated in your pack - trust me, you don't want lasagna water running all over your pack!


When it is time to cook, add more water, but not a lot more. I know that's vague, but I don't bring measuring cups with me in the backcountry. Still, rehydrating your lasagna is just going to best left to your own judgment. I personally don't like to eat my lasagna as a stew, so I carefully monitor how much water I put in my cook pot. Only a little bit of fuel (good reason why it is ultralight!) should be used to heat up the lasagna. Stir briskly in the pot, so it does not burn the bottom of your pot, add a bit more water if needed, and enjoy!


Lasagna in the Cook Pot
Cooking Lasagna

The lasagna will not have the exact same consistency as if you pulled it out of the oven, but it's close. Just a reminder, it's freaking lasagne on the trail! Enjoy it while everyone else eats their Knorr with tuna or an over-priced Mountain House meal in a heavy-duty plastic packaging. Treat yourself well out there. Eat right, and happy hiking!


Freefall Enjoying Lasagna
Happy Hiker Eating Lasagna


Sunday, July 12, 2020

Herman Creek - Nike Terra Kiger Review Part 1

Several years ago, I hiked a loop with my buddy Allgood, taking the PCT out of Cascade Locks up to Wahtum Lake, and back down the Herman Creek Trail. It's a great trip! One of my favorite memories from that trip was camping overnight at Cedar Swamp on the Herman Creek Trail. I got out of Portland this past weekend to get back up there to re-visit this quiet, beautiful, dense cedar grove, and escape the hustle and bustle of my urbane existence.

Herman Creek Trail Sign

Herman Creek Trail Sign


I also just got a pair of Nike Terra Kiger trail runners, and I promised my client, who works for Nike, that I'd give them a thorough review, to see how they perform as a shoe for the long distance hiker. I've tested and reviewed gear before for Mountain Hardwear and Salomon, and am always interested to see what other stuff is out there. I still trend towards wearing LaSportiva Wildcats (love the shoe!), but I feel the need to expand my awareness to what else is out there. I've not owned a pair of Nikes in maybe 27-years, so it's been a long time since the swoosh was spotted on my feet.


For those who have not been up the Herman Creek Trail #406 from the trailhead parking lot, all I can say is get ready to get the heart pumping. The climb up is a steady, monotonic ascent through dense forest, some of which burned up in September of 2017. The burning and scarring on the trees is quite noticeable on this hike, and apparently worse on the Nick Eaton Trail, and signs indicate that this trail is damaged and difficult to hike. Still, it seems like the fire in 2017 might have made this stretch of forest heartier and healthier in the long run, since it consumed a lot of the thick understory. That said, I am no forest expert!

burned trees

Large Burned Tree

An old burned tree


Back to the climbing. Yes, this trail will get the legs burning if you push it, and I did. I brought my dog, Lucy, with me on this hike, and I was trying to keep pace with her, since she was on leash ahead of me. The climb meandered in and out of gullies, and thankfully crossed many small flowing streams or rills, where I (or my dog) could catch my breath and get a drink water. 

Dog standing in a stream

Lucy cools off and drinks from this stream


As I continued my ascent, I noticed how comfortable my feet were in these Nikes. What's more is that I noticed how well they gripped the trail's tread. The Terra Kigers do not have the traditional black rubber sole with a space alien pattern of yellow or red coloring the bottoms. Instead, the soles are red and white, with some good knobby lugs on the bottoms, which provide an excellent grip on dirt, rocks (wet and dry), and roots. Nike says that these shoes feature Multi-Surface Traction, boasting "Multidirectional traction lugs in the forefoot and heel (that are) are made from high-abrasion rubber for enhanced grip on descents and ascents. A rubber pod at the midfoot helps deliver wet-surface traction." I never once felt the soles slide out from underneath my feet. These are good shoes. 

Nike Air Zoom Terra Kiger 6 Trail Running Shoes

Nike Air Zoom Terra Kiger 6 Trail Runners

After 7-miles of charging uphill, I made it to my destination: Cedar Swamp. There are plenty of cedars up here, and they are huge trees. Some trees have seen the axe (or chainsaw), but for the most part, this grove of trees has been spared large swaths of cutting. The terrain is not really that swampy, but a nice flowing stream provides water through the flat areas best for camping. Still there were bugs up here! Tired from the couple hours of hiking, I pitched my tent, made dinner, and snuggled with my dog for the night.

Dog and massive cedar tree

Lucy stands in front of a huge cedar tree


After all the ascending the day before, I could look forward to how well the shoes were going to hold up on the now steady descent. Again, I was very impressed with their traction. My feet also honed in on the cushioned ride I was experiencing on the trail. I was not feeling any rocks or nubs on the tread. If anything bothered me about the shoes it was that my toes felt more confined than they did the day before, but I chalk that up to feet swelling from the 7+miles of hiking I did a day earlier. As a side note, the shoes I got are a full size larger than my 8.5 shoe size. I usually go a size larger whenever I buy new shoes, and I know that Nike has a reputation for making a snug shoe. As this is a long-range test, I will be curious to see how the The Terra Kigers feel on my feet over a multi-day trip.


Balancing on a slick rock in my Terra Kiger 6 shoes

The trip back to the car seemed effortless, and the downhill hike was quite perfect in terms of grade. The trail never felt too steep going downhill, and I got to see many of the gullies and waterfalls that I saw the night before. Lucy regained all her energy after her good night's rest. I met several trail runners going up to where I camped, and some were doing the loop over to the Pacific Crest Trail, and taking the connector back to Herman Creek. One thing that has to be mentioned in they age of COVID-19 is that 9 out of 10 hikers had a face covering ready to mask up when they came towards me. The hiking community is wonderfully thoughtful and respectful about trying to prevent the spread of the virus. I wore my mask as well!

masking up for COVID 19

A bandana or a Buff is a good thing to wear when meeting other hikers on trail

I hike again next weekend. Not sure where I am going, but I will be with my buddy Allgood for the adventure. Lucy, of course, will make the trip too. She is in training with me for a longer hike in August, so she will be seen again. Anyhow, more demands (high mileage and different terrain) will be placed on these Terra Kigers. On my next trip, I will get them wet, and see how long they take to dry out. Let's see how they respond!

Oh... here's a video from my hike this morning.


Friday, October 4, 2019

Five Questions with Whitney "Allgood" LaRuffa

ALDHA-West had its Gathering on August 27-29 down at Camp Augusta, near Nevada City, California. I had the chance to attend the event, and take a few minutes to interview my good buddy Whitney "Allgood" LaRuffa. This is my second five questions format video (the first was with Uncle Johnny!), and I think I will produce more of these going forward. Anyway, I thought it would be good to do this as a tribute to Allgood, since he is finishing his tenure as the President of ALDHA-West.


Congratulations Allgood on your six years of service to ALDHA-West! Your dedication and leadership has transformed the organization to meet the needs of the long distance hiking community.

Tuesday, September 3, 2019

First Post In Nearly 7-Years

Ker-splash! Yesterday, I made a splash back into the world of blogging with my post about pooping in the woods. I've been gone from this blog for a while. Try 7-years! Not that I have been totally away from doing this blogging thing, since I made a few posts on my other blog hikethecdt.blogspot.com back in 2016.  Still, there's this blog, and I started it back in 2007 when blogging about long distance hiking and thru-hiking was becoming a thing, so I'd like to think I was part of a hiker digital revolution back in the day.

Climbing Baden-Powell in 2003 on the Pacific Crest Trail
I started this blog when I was getting a certification in Integrated Marketing from San Francisco State University. I took a social media class, and part of the exercise was to create a blog about something I was passionate about. Of course, I chose long distance hiking and the name Distance Backpacker, because I had to come up with a unique name on the spot (I think thruhiker.blogspot.com was taken at the time, and if you click the the link, it's still there with no meaningful content. Who the hell is sitting on that?!). Anyway, this blog was created for a class project, and I ran with it for 5-years posting content on a semi-regular basis.

My content at the time was sometimes pretty random. I'd post something about a gear idea, or I'd write about a fire closure, or a hiking trip I took with my niece in Colorado. As I look back on my posts, I think it's good to post trip reports, and gear ideas, but I don't think it's necessary to make posts about trail closures and fires. Organizations like the PCTA and the Appalachian Trail conservancy got that pretty well handled.

I am going to blog more about my expertise, knowledge, and experience in long distance hiking. I've been doing it for 20-years now, and you know, I've got some wisdom to share with the world. Dare I say that I am an authority on the subject? Hell yeah! Granted, I am kind of an old fossil when it comes to all the latest gear companies, apps, and innovations, but I am pretty much still in the know on what is cool, and what people are using these days.

Whitney "Allgood" LaRuffa would be a good interview!
Still, I don't think this blog should be concerned so much on gear and innovations as it should be about the people who are involved in the hiking culture, long distance hiking wisdom, and long trails. I've had some ideas swimming in my head, and I plan to do a few interviews (like I've done before with Uncle Johnny (RIP) and Billygoat), continue with trip reports from sections I am re-hiking on the Triple Crown and other trails, and share the knowledge, thoughts, and ideas swimming in my head.

I will re-commit here on the blog, and see where it goes. I am not sure how much traffic this blog will get, but as they say, "content is king on the internet," and I am sure that people are still reading and not just looking at the pictures only. It's good to be back, and dammit, I have something to say!

Monday, September 2, 2019

Pooping in the Woods

Using the Deuce of Spades #2

One of the newest pieces of gear that I carry with me is the Deuce of Spades #2. My friend Allgood turned me on to using the Deuce on a few trips, and now I am sold on its use. The Deuce can be ordered at thetentlab.com, and comes in three different weights: Deuce #1 weighs in at .45 ounces; Deuce #2 is .6 pounces; and Deuce #3 at .97 ounces. Deuce #1 is light duty, or where soil conditions make digging easy (think sand). Deuce #2 (model I am demonstrating here) might be used in woods like the Pacific Northwest where soils may have some small roots, but soil is somewhat loamy. Deuce #3 might be used in soils that are more compact or dense. The Deuce is made from "aerospace grade 7075-T6 aluminum" according to their website, comes in a range of colors, and ranges in price from $18.95 for the #1 to $24.95 for the #3. My #2 cost $19.95.


Leave No Trace ethics asks that poop be buried in a 6" to 8" deep cathole that is also 4" to 6" wide. The Deuce of Spades make this digging pretty easy. The serrated leading edge of the trowel cuts through the top surface of the soil, and can carve out small roots that get in the way of digging a hole. Remember trying to use one of those cheap Coghlan orange plastic trowels? Digging and removing soil was difficult, the size and shape did not match ultralight hiking gear, and weighs 2-ounces. The Deuce is lightweight, and its wide, curved shape is ideal for removing soil quickly and easily. 

On a recent trip to Indian Heaven Wilderness in the Gifford Pinchot National Forest, I used the Deuce#2 for disposing my waste. Below is a video I made on using the Deuce to bury poop.


I recommend adding the Deuce of Spades to your hiking gear arsenal. It works! It's lightweight! And, it does a great job of disposing of your poop properly. Buy one now!


Sunday, September 2, 2012

Weight Savings Idea: Fuel Bottle

This might be splitting hairs here, but I just discovered another way to save weight for a hike, and it is with fuel bottles. Normally, one carries an old plastic water bottle, which might weigh an ounce.  Or, one will carry a plastic fuel bottle, which is provided as a part of one's stove kit, like the one I got when I bought a Caldera Cone  from Trail Designs (see pic).

Caldera Cone Fuel Bottle
Another fuel bottle to consider is a mylar package with a screw top, like the Buddy Fruit package that is pictured just below.  I got this idea from Heesoo, a 2012 PCT hiker I met in Washington.  He managed to get a whole bunch of these 3.2 ounce packages, and mailed them (fuel inside) to himself. By the way, if you are wondering, yes, it is legal to send alcohol fuel in the mail, due to the low flashpoint (see postal regulations here).

Mylar Package Fuel Bottle


This bottle has about 4-meals worth of fuel in it (larger packages can be found in the baby food aisle in your grocery store). When I say 4-meals, I am talking about boiling enough water to rehydrate a meal that I prepared beforehand - of course, another way to save weight - and not for preparing food at a steady boil for 8-10 minutes. I'd say that the bottle weighs maybe a half ounce, or perhaps less. And I'd guess that the cons to this contaner are durability, and trying to get fuel in the small mouth of the bottle; the latter can be mitigated by including a small plastic funnel in one's bounce box.

Anyway, I've just included this fuel bottle in my cook kit, and am eager to try it out next time I am on the trail. What are your thoughts on this idea?

** A few days after I posted this, I heard from Heesoo. He says, "The fuel bottle idea was mainly to fit the fuel bottle inside my cook pot. With the chopped caldera cone, I can get the cone, four+ days of fuel, stove,and lighter in the cook pot. I like having it all contained in one spot instead of having a 1L pot and another ~1L container for the cone, fuel and stove. The squeeze fuel bottle does have durability issues. It can develop pinhole leaks where the bottle repeatedly flexes."

Thursday, August 30, 2012

Them Darn Aqua Mira Bottles


Cracked Aquamira Bottle
Cracked Corner on Aquamira Bottle
I've been using Aquamira for nearly 10-years. Yep, I am a big fan of the stuff. In 2003, I was sponsored by it's parent company, McNett, with 7 packages for my Pacific Crest Trail thru-hike. I never had a problem with water borne illnesses on that entire hike. I continue to use it exclusively on day hikes and long distance trips.

If I have one beef with Aquamira, it's their bottles. First of all, they are big. There's more than enough of the parts A and B bottles to treat enough water for 700+ miles on a typical thru-hike. Second of all, the corners of the bottles are prone to cracks. I was just a victim of a cracked bottle on the PCT back in April. I hiked to a small creek south of Pacific Mountain, and could not squeeze anything out of the part B bottle. This was on the first day of my trip, and like an idiot, I brought no back up water treatment.  Yep, I'd be dipping and sipping for the rest of the trip.

Apparently, I chose the right water sources, as I have had no effects from giardia or cryptosporidium. That said, I felt naked without water treatment for the rest of my hike.

Small Bottles Included
At the most recent Annual Day Zero Pacific Crest Trail Kickoff, I walked over to the Gossamer Gear booth, and saw that they had a really cool alternative to carrying the square Aquamira bottles. They were selling smaller, round-shaped bottles, in which Aquamira can be transferred. Duh! How come I haven't thought of this one earlier? One bottle has a yellow top to avoid confusion between the Part A and Part B bottles, are easily filled, and hopefully are more puncture resistant than those ridiculous square, plastic bottles.

Gossamer Gear sells these small bottles when you order their Aquamira kit from them for $16.00.  I would imagine that one might be able to get these small bottles at a chemistry supply company or even a dollar store, but one might as well get the bottles from them.

Be careful when filling these bottles up. Here's what Gossamer says on their website: "We recommend using the opaque mini dropper bottle for the Part A, and labeling it with a permanent marker as such. This is because the Part A solution is more photo-sensitive. We include a clear mini dropper bottle for the Part B, because this allows you to monitor the amount of solution remaining in your kit."

Hats off to Gossamer Gear for a simple, but great ultralight solution!

Friday, May 25, 2012

Pacific Crest Trail Section D: Day 3

Day 3 Camp North of Vincent Gap to Cajon Pass - 33-miles

Pacific Crest Trail Blaze and Mount Baden-Powell
View of Baden-Powell from PCT Marker
I left my tent in the middle of the night.  Wind gusts slapped the fabric of my Gossamer Gear One tent throughout the night, so I moved to one of the benches, and slept soundly until rain drops fell on my nose and cheek.  I jumped out of my sleeping bag immediately, and started moving my gear under a nearby tree. The rain died after I moved my last items under the tree. I slammed my breakfast, packed up, and descended toward Highway 2 at Vincent Gap.

From Vincent Gap, the trail ascended 800-feet to Blue Ridge, where the trail leveled out, providing occasional sweeping views east toward the Mojave Desert. Patches of snow occasionally covered the trail, but posed little difficulty for hiking.

At Grassy Hollow Visitor's Center, I refilled my water bottles, and took a moment to capture a picture of me standing next to a PCT sign with posted mileages to Mexico and Canada.  I remember this sign from my 2003 hike, and it seems like I see this picture every year in photo presentations at the Kickoff.

Climbing out of Grassy Hollow, my sights were set to the west, where I could see Mt. Baldy, and beyond it, a band of rain moving toward me.  Great... rain... Before I left on this trip, I heard that a storm was moving in, but I did not know that it was moving in this early! Rain began to spit on me, and then turned into a steady shower. I donned my rain jacket.  I kept hiking to the next intersection with Highway 2, where I took cover under an informational kiosk. Was this the monumental storm I heard about moving in early?  Should I hitch to Wrightwood, and get off the trail early?  If I do that, when am I ever going to get back to this point to hike from here to Cajon Pass? I donned my rain jacket, and decided to push on.
Famous Pacific Crest Trail Sign at Grassy Hollow Visitor's Center
"Famous Sign"

After crossing Highway 2, I ascended toward Mountain High West ski resort.  The steady rain that had fallen earlier stopped completely, and skies started to clear up. I pulled the rain jacket off during a surprisingly 'brutal' climb (by PCT standards) up what appeared to be an old jeep road, which may be a remnant of development from the ski resort.

I came to a large, open, fenced-in, plastic-lined, man made water tank.  By wilderness standards, this is thing was out of place, but by skiing standards, it is essential for making snow at the resort. Regardless, it is ugly.

I stopped for a short break, and absorbed the scenery to the west. Again, I looked back at Baden-Powell, and it's daunting, dramatic, west-facing slope. The weather was now downright sunny and warm. What a perfect moment!

Mount Baldy
A view of Mount Baldy from Blue Ridge
The trail followed the ridge, darting in and out of forest, crossing and paralleling forest service roads, and passing campgrounds, namely Guffy Campground. Guffy is significant place, since it has the first, reliable water source for northbound PCT thru-hikers 22.5-miles after Cajon Pass.  Likewise, this was a critical water stop for me, and I missed it. Yep, I blew right through the campground, because I just was not paying attention. Stupid me.  I had about a liter and a half of water when I passed through, and after I realized my mistake, I figured on rationing the rest of the way to Cajon Pass.

I passed the Acorn Trail (a steep descent that leads to the hiker-friendly town of Wrightwood), and after another mile, the Baldy Trail.  If I were not pressed for time on this hike, I would have taken the 4-mile side route to the top of Mt. Baldy, a 10,063-foot peak in the middle of the Sheep Wilderness - that trip will come another day.  From this point (8,328-feet), the PCT begins a very long, gradual descent all the way down to Cajon Pass (2,995-feet). Passing through ponderosa pine forests, the PCT offers occasional, yet exceptional views of Mt. Baldy to the southwest, the San Andreas Fault and Cajon Pass to the east, and Mount San Gorgonio and Mount San Jacinto to the South.

San Andreas Fault
A View of the San Andreas Fault
I followed the trail along Blue Ridge down to the Upper Lytle Creek Divide, a fast, yet sun-exposed hike through the south end of the San Gabriel Mountains. Clear views of the San Andreas Fault Zone, which Lone Pine Canyon Road follows, caught my interest and fueled my geological imagination. What did this area look like thousands of years ago? What's the greatest shift along this fault line? What would happen on the trail here if a large quake happened right here, right now? Would I be dodging boulders? At least I had these thoughts to distract me from thinking about how parched I was, since I had a half of liter of water left for another 11-miles of trail, and the sun continued to beat down on me.

I met a few thru-hikers going the opposite direction. They asked about the climb up this dry stretch of trail, wondering how much further it was to Guffy Campground.  I could only guesstimate the mileage, and offer some hope by telling them that the climb is steady, but not steep. What a tough stretch for a northbounder! I asked about Bike Spring just below, and was told, "Don't bother."

Swarthout Canyon
Looking North at Swarthout Canyon 
Getting closer to Swarthout Canyon Road, the trail twists, meanders, and turns, which seems to add unnecessary mileage, but this terrain, covered with thick chaparral and cut by countless dry gullies, dictates a winding path.  At the road, I looked north through the San Andreas Fault Zone, and was amazed by the two ridges (Upper Lytle Creek Divide and Circle Mountain Ridge) which lined this alluvial channel in the desert. The sun was starting to set by this time - the scenery looked heavenly.

The trail hugged the west side of Ralston Peak, which I had been observing from Upper Lytle Creek Divide for the last 3-hours. I stopped for another break, and drank the last few swallows of my water, and ate some dehydrated mangos. For the fist time, I noticed a tick embedded in my leg, and as much as I hate ticks being attached to me, I thought it was better to deal with it later. I had more hiking to do, the sun was getting lower, and high winds and clouds began to move into the San Gabriels - a storm was coming.

I entered the oddly, but beautifully-shaped, Mormon Rocks section of this hike, where the trail undulates over nubs, along short ridges, and down into chasms. Small caves, and wind-shaped depressions in the rock tempted me to stop, explore and play, but I was too focused on getting water at Cajon Pass that I blew these features off.
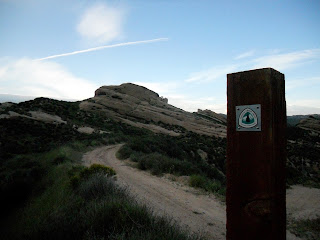
The Pacific Crest Trail at Mormon Rocks

Civilization grew closer, as I crossed railroad tracks, walked past dilapidated homes, and the hum of Interstate 15 became louder.  I crossed a creek, but chose to continue on, knowing that the water at McDonald's needed no treatment. I crossed under I-15, and arrived at the PCT trailhead at Cajon Pass. I was finished with this long day (32-miles), and celebrated with a burger, fries, and cold, delicious water!


Thursday, May 24, 2012

Pacific Crest Trail Section D: Day 2

Day 2 Winston Spring to Camp North of Vincent Gap - 25-miles

Burkhart Trail Alternate Route
After studying my maps, courtesy of Halfmile, I realized that hiking was going to involve a road walk for several miles along Highway 2. Great... The PCT is closed from Eagle's Roost to the Burkhart Trail through the lush Copper Canyon.  However, the closure is there for good reason. The nearly extinct Mountain Yellow-Legged Frog once thrived in this area, and in order to protect its breeding grounds, hikers are prohibited from traipsing through this area.

What I did not realize is that there is a better alternate route that I took on this trip. I had Half-Mile's maps from last year, which told me to take the road walk. Now there is an longer, more circuitous alternate that travels through Devil's Punchbowl County Park (which I have heard is quite scenic!) that is the official PCTA detour. Oh well...

Panoramic View From Saddle Below Mt. Williamson
From Cloudburst Summit I descended the PCT to Copper Canyon. I remember this stretch well from my 2003 thru-hike, as it traveled through dense, lush forest, and provided plenty of water for the parched hiker. I ascended the Burkhart Trail up to Buckhorn Camp, and then took a cross country route up to Highway 2. For the next 4-miles, I walked a sun-drenched highway, passing by an old, dilapidated ski resort, and the occasional off-road picnic area. There was little traffic on the road this early in the season, so the miles were not so sketchy, just hot!

Little Jimmy Spring - a critical (and great!) water source!
At Eagle's Roost, I rejoined the PCT near a large, white highway maintenance building, and climbed up a few hundred feet, and after a short mile, dropped again back to Angeles Crest Highway.  I really hate how the PCT runs in the shadow or hovers over this highway. Motorbikes and discarded trash on and around this high really detracts from any wilderness feel one might get in the San Gabriels.

The PCT then climbs steadily towards the top of Mount Williamson. Actually, the trail skirts just below the summit, but one can take a short side trail to a rewarding panoramic view.  I took a break on the saddle just below the summit, and noticed on my maps that the trail dived right back down to the highway... yep, this is one of those PCT PUDS (pointless ups and downs), established perhaps because the trail is displaced by the highway.  I enjoyed some homemade jerky, fruit leather, and GORP, removed my shoes and socks, and took in the pleasant view.

Mt. Baden Powell Summit
Summit of Mt. Baden-Powell
The descent to the highway was quick, painless, and quite pleasant.  Going down, I could see how the trail climbed straight back up the mountainside on the other side of the road. More climbing. I had a half liter of water for the next two miles, and was parched on this warm day full of ascents, and I looked forward to refilling at Little Jimmy Spring.  Luckily, the trail ducked under the cooler cover of trees about half mile south of the highway, and then started running into occasional patches of snow covering the trail.  I munched on snow.

I passed through a snow-blanketed Little Jimmy Campground, and after another .2-mile, arrived at Little Jimmy Spring.  I chugged a liter right on the spot, and filled up another two liters for the 8-mile stretch to Lamel Springs.

Ancient Limber Pine
Higher up, the snow patches gave way to snow fields, and often I lost sight of the trail.  I soon figured that it was best to just hike cross-country off the snow, especially along the ridges.  Sometimes I followed other foot prints off trail, and other times I was blazing my own path.  I asked myself, "Why did the trail builders put the PCT on the snow-prone north side of the ridge, and not on the south side?" It seemed like the trail could easily be on the other side of the ridge... oh well.

At 6:41 pm I arrived at the summit of Mount Baden-Powell, named for Lord Robert Baden-Powell, the founder and Chief Scout of the Scout Movement.  This peak is a pilgrimage for many scouts hiking the Silver Moccasin Trail, and a sturdy monument dedicated to Baden-Powell stands just slightly off the summit.

More interesting than the monument are the ancient limber pines that grow just below the summit of the peak. These stout, drought tolerant, wind-loving trees stand like arthritic, gnarled guardians, with centuries-old battle scars. Many of them have old exposed root systems, which have endured the steady erosion of the soil. They are beautiful trees, and one of them is estimated to be 1,500-years old!

Alpenglow in the San Gabriels along the Pacific Crest Trail
Alpenglow in San Gabriels
With the sun setting, I began my scramble down the snowy north face of this mountain.  Apparently snow fell on this mountain a few weeks back, and there was no trace of the PCT going down... none.  The only thing I had to go on were steps in the snow, which I followed, despite the waning daylight.  The snow was mushy, and a couple times, I postholed mid-thigh, especially early on.  Later, I found switchbacks, which I followed closely, since I was looking for the side trail to Lamel Springs.

When I gathered water at Lamel Springs, I could barely see the side path leading me back to the PCT.  Snow was still prevalent along the trail, and I did not feel like crossing the patches in the dark.  I hoped to find a flat spot soon.  About a mile south of Lamel Springs, I came to a small flat rest spot with two benches, just off the crook of a switchback.  In spite of wind gusts, I set up my tent, cooked supper, and rested my weary feet.  I had just hiked 25+ miles for the day, which included climbs up Mt. Williamson and Baden-Powell.  Rest was justified!

Monday, May 21, 2012

Pacific Crest Trail Section D: Day 1

Introduction

View North Toward Mill Creek Summit
When I thru-hiked the Pacific Crest Trail (PCT) in 2003, I blazed through sections of which I have little recollection. Since that time, I have been revisiting the PCT, and hiking sections to rekindle my love affair with this trail, relive memories of 2003, and get a better in-depth experience of a section. Recently, I hiked a 77-mile (or 75?) section of trail from Mill Creek Summit to Cajon Pass.

I had hoped to hike this section last year when I did sections F and E, but it was closed. In 2009, the Station Fire, one of largest wildfires in California history, scorched large portions of San Gabriel Mountains in the Angeles National Forest, and forced all 2010 thru-hikers to walk roads from the Wrightwood to Agua Dulce - that must have sucked.

The highlight of this section is without a doubt, the climb up Mt. Baden-Powell, whose snow-covered north slopes can pose a formidable challenge to the early season hiker - I will mention more about that later!  This section also presents the opportunity to take a side route and climb Mount San Antonio (Mt. Baldy), the highest peak in the San Gabriel Mountains.

Day 1 Mill Creek Summit to Winston Spring - 19-Miles

Mill Creek Summit is near the epicenter of the fire, and it's shaded picnic area was completely destroyed. A new new restroom facility stands naked at this exposed road crossing, surrounded by barren slopes, denuded from the fire. This was my starting point.

wildflowers emerge from station fire burn
Wildflowers Emerge From Station Fire Burn
The PCT climbs gently but steadily along slopes, which used to be filled with manzanita, chamise, and Our Lord's Candle (Mojave Yucca).  Now Poodle Dog Bush, which can cause skin irritations for many brushing against it, grows abundantly along the trail, protecting the soil from erosion.  Occasionally, the trail darts under the cover of pines, whose dark, charred remains provide little escape from the high sun.

After climbing toward the top of Pacifico Mountain, the fire damage becomes less noticeable. Sweeping views to the east reveal the expanse of the Mojave Desert, and to the north, the fire damage along the slopes of Mount Gleason.

Descending Pacifico Mountain, I returned to the chaparral that I was familiar with from my 2003 thru-hike. Near Sulphur Springs campground, I refilled my water bottles with water I had to take a chance on. Unfortunately, the part B bottle of my Aqua-Mira sprung a leak, leaving me without water purification. Yep, I'd be dipping and sipping the rest of this hike!

Sunset in San Gabriels
The trail meandered to my first crossing of the Angeles Crest Highway at Three Points. For many northbound hikers, Three Points represents the last of many crossings over this scenic highway.  From Three Points, the Pacific Crest Trail parallels the highway, which is occasionally hidden by a hillside or below an escarpment.  I found the highway to be a nuisance because of the occasional engine noise from cars and the proliferation of garbage, which seems to drift toward the edge of the trail. I wish the trail would take a different route away from the highway. Ugh.

From Three Points, the PCT joins up with the Silver Moccasin National Recreation Trail, a 53-mile long hike that is popular among boy scouts seeking their Silver Moccasin Trail badge.  I hiked about a mile beyond Three Points to a small rill, where I retrieved water, and cooked a macaroni and cheese meal.  Continuing on, I passed Camp Glenwood, a rustic looking camp, equipped with a couple pit toilets, and made camp about a mile north of Cloudburst Summit. I found a nice flat spot, and conveniently tied my food up on a single, low transmission line hovering over my campsite.  I laid down, and let the sound of a gentle flow of water through Cloudburst Canyon lull me to sleep.

Friday, May 4, 2012

Condor's PCT Adventure in 3-Minutes

One of the videos featured at Annual Day Zero Pacific Crest Trail Kickoff's Video Shorts Festival was "Condor's PCT Adventure in 3-Minutes."  I've seen SunWalker's facial transformation video, which is awesome, but Condor's video definitely takes the cake. He won the "Best Spirit of the PCT" category for this video, so check it out:


Condor (Kolby Kirk) also runs a website called thehikeguy.com, which is loaded with information about his hikes, and includes hiker outings out of the Bend, Oregon area.  Condor also has a few clips from his journals, which are amazing pieces of art work. Seriously, the time, detail, and effort he puts into his colorful, textured journals tell a multifaceted story, which cannot be captured online. I got to travel back to Oregon with him, and he showed me his journal for his upcoming Sierra Trek Hike.  I was utterly amazed at what he had already written, painted, and "stickered"into his journal before the big hike. Very cool.


Tuesday, April 17, 2012

Original Pacific Crest Trail System Signs

I hit the motherlode today.  In the midst of traveling back from Washington state, when I met a hiker, named Will, who did the Pacific Crest Trail back in 1998.  We had a conversation over breakfast, and he invited me to come back to his place, as I had a couple hours to kill before my bus arrived.

When we arrived at Will's place, he said that he had something for me, and he pulled down a light blue shoebox, and on the front of it were the words "PCT Signs" scribbled with a black Sharpie. He pulled out a diagonal sign, with an evergreen tree in the middle, and the words, "Pacific Crest Trail System" bordering the diamond shape. I recognized the sign as I've seen a few old rusty ones like it engulfed by bark on trees.  The sign was wrapped in wax paper, and looked authentic, but I assumed that it was a replica.

I was grateful for the gift, and I asked how he got these replicas. "They're original," he said.

Amazed, I asked "What?"

"Yeah," he responded, "when I was in the Forest Service, I found these in a dumpster. A forest service employee had simply discarded them, and I rescued them."

I couldn't believe it, as he had a lot of these signs.

Apparently, Will releases one sign a year on eBay, and he said that they usually sell for about $60-100.  He said that he'd rather not sell them all at once, so he doesn't flood the market.

With Annual Day Zero Pacific Crest Trail Kickoff (ADZPCTKO) coming up on April 26-29, I made the bold move, and asked him if he might consider donating a few to the Silent Auction.

"Sure," he said.

So, I grabbed two signs, and immediately emailed Carl and Jan Siechert with the news.

Today was one of those days where I happened to be in the right place at the right time.  Now, I hold a piece of history of the trail that I love so much. Thanks Will for the gift, and being a trail angel off the trail. You rock!

Friday, March 23, 2012

Balls and Sunshine's 2011 Hike on the PCT

Well, Oregon Public Broadcasting (OPB) did it again... another video about hiking. I just posted recently about Lint's ultralight set up, and now, OPB has a great video about Balls and Sunshine's adventure on the Pacific Crest Trail. For those not familiar with Balls and Sunshine, they are a father-daughter hiking duo (or should I say MACHINE!) from Salem, Oregon. They completed the PCT last year, and as it turns out, Sunshine is the second youngest to complete a PCT thru-hike, just behind Scrambler, who hiked in 2004. Check out the video below to learn more about Balls and Sunshine's epic hike.


Watch Season 23, Episode 13 on PBS. See more from Oregon Field Guide.

Stories like this deeply move me. The trail has a way of bringing people (and families) closer together in a way that cannot be experienced in a culture filled with distractions. Adversity, challenge, wanderlust, and simplified living strip us down to our core, revealing our vulnerabilities, and tempering our relationships. I often think back to my hike on the CDT with my friends Luna, So Far, George, Tooth Fairy, Patch, Panda, and Chance, and how much I appreciated getting to know them through that trip. I wish I could do it again!
Congrats again Balls and Sunshine on your thru-hike in 2011, and best of luck as you set out to hike the Appalachian Trail!

Friday, March 2, 2012

Ultralight Hiker: Lint

My friend Lint, was just featured on Oregon Public Broadcasting's "Field Guide," where he proudly (and humorously) demonstrates the joys of ultralight backpacking.  For those of you who do not know Lint, the guy is an ultralight hiking stud, who is one of the most genuine, humble  guys I know.  He has hiked the Appalachian and Pacific Crest Trails twice, and he is hiking the Continental Divide Trail for a second time this coming summer, yep, he will be a Double-Triple Crowner come next September.  Enjoy the video below! Skip ahead to the 8:50 mark.

Watch Season 23, Episode 12 on PBS. See more from Oregon Field Guide.

Monday, October 31, 2011

Hiking 26

I just saw this website called Hiking 26, and I had to blog about it. I have not done much research on this hiker named Ron Ulrich, but what I know is this: he will hike the Pacific Crest Trail (2600-miles) in 26 weeks, and will wear 26 wedding dresses for the duration of his hike. Yep, that's about one wedding dress per week.


I love this project! Here's why: his endeavor takes all the pretension out the current über hiker-than-thou thing going on in the long distance hiking community. We have so many people attempting speed records every year, using the trail as a platform to raise money for a cause, or showing off the latest ultralight contraptions or techniques. Ron Ulrich's Hiking 26 project is a fresh take on hiking the trail. It is a bit art, a bit challenge, and a slap in the face to everyone that takes their long distance adventure way too seriously. Is this project shameless self promotion? Yes it is. So what? So are all the other hikes that are documented on Trail Journals or Postholer. And people announcing their speed record attempts? It's huge self promotion.

I say, "Go Ron! Go! Have a great hike, and may all your wedding dresses whisk you gently to Canada!

Tuesday, October 25, 2011

Picture From Sky Camp

Back in July of 2010, my hard drive crashed on my computer, and I lost a lot of information.  What an idiot I was for never backing up information (lesson learned!).  I had some pictures on an external hard drive that survived, and they are my only photos remaining from the 2007-2010 era of my life.

I dug out a few pictures of a sunset and sunrise at Sky Camp at Point Reyes National Seashore in California.  I love the place, and I have hiked and backpacked there whenever the opportunity arises.  Anyway, I thought I'd share some pictures from a trip in 2007.   It was the first time I had ever camped at Sky Camp, and I was floored by the views.  Enjoy the pics!

Sunset and Waxing Moon with View Out to Pacific Ocean

Sunrise on Dead Tree with Pacific in Background

Sil-Tarp Sunrise at Sky Camp

Gear Review: La Sportiva Wildcat Mountain Running Shoe


La Sportiva Wildcat Shoe
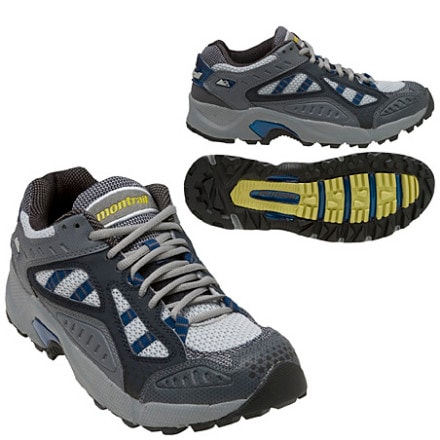
I walked into the Nantahala Outdoor Center’s (NOC) Outfitter on March 16th just after closing time.  My 2007 Montrail Hardrocks were falling apart after a mere 70-miles of hiking on the Appalachian Trail, and I needed another pair of shoes to continue hiking north.  The salesman, a previous Appalachian thru-hiker named Alpine, told me that he’d take care of me.  Thank God.


My hiking partner, Found (PCT ‘06, CDT ‘10) had a pair of green La Sportiva Wildcat mountain running shoes, which he highly recommended, saying that they are now the new standard for long-distance backpacking.  I noticed that Alpine also had a yellow pair.  The gear shop sold a red-colored pair of Wildcats for $99, so I asked to try them on.

  
I tried on my usual size 9, which Alpine thought was a half size too small for my foot - I agreed.  Then I tried on a shoe a half size larger, which allowed for more room in the toe box. After ambling up and down a small, portable ramp, I felt that I found the right fit, and bought them.  I thanked Alpine for staying 15-minutes after closing time, and walked out with my new pair of shoes.


The Wildcats were super comfortable.  Unlike the rigid Hardrocks, which have a rock plate in the sole, the Wildcat’s Frixion soles had give to them, and felt gummy.  My feet liked this feeling.

Out on the trail, the soles gripped the AT’s tread of angled rocks and wood steps.  I felt confident with each step, and rarely did I ever slip on these surfaces, even when it was wet outside.  Muddy conditions were the “achilles heel” of this shoe, as I slipped and slid on ascents and descents.  However, I  think mud on the AT would cause most trail running shoes to do the same thing.


650-Miles of Wear on these Shoes!
I also found the Wildcats to be very breathable.  For the uppers, the shoe uses a lightweight mesh and thin inner liner, and in wet conditions, the shoe drained well, and dried out quickly.  I hiked a 350-mile stretch through the driest parts of the Pacific Crest Trail, and my feet never felt stifled by heat in the Wildcats.  They were perfect for the PCT!


I liked the lace harness on the Wildcats.  The shoes I purchased were roomy for my feet, but I felt that my feet were locked down in place due to the lacing.  Finally, I don’t know what La Sportiva did with the laces, but they never came undone on me on the trail.


Mesh Tearing from Sole
Alpine told me that I’d get about 450-miles out of the Wildcats, and he was right.  After hiking from Walker Pass to Highway 58 on the PCT in California, I noticed that the mesh was starting to tear apart from the sole on the right foot.  Then after hiking another 50-miles into the Antelope Valley, the mesh and inner lining on the Wildcats continued to tear away.   However, the soles had so much life to them that I continued to hike in them, and I added another 200-miles to Alpine’s 450-mile prediction.


I highly recommend La Sportiva’s Wildcats for long-distance backpacking, especially if one is going ultralight.  The soles are grippy and durable, the uppers are breathable, and the shoe is designed for the comfort of feet.  Even though they started to wear out after 450-miles, one can get extra miles out of them.  I believe in these shoes so much that I’ve already purchased another pair of Wildcats.  This time they are green!

* Here's a little article that was posted on September 18th, 2012 about the Wildcats being a hit among PCT thru-hikers. 

Saturday, October 22, 2011

Uncovering the Story of a Helicopter Rescue

Back on May 11th, the Riverside Mountain Rescue Unit airlifted a Pacific Crest Trail hiker near Snow Creek in southern California. The following video shows the rescue:

After watching the video, I could not figure what was wrong with the hiker. She was not unconscious, nor did she have broken leg. She looked fine! I did a little research, and I found a detailed report for the rescue, but the hiker's ailment was never listed. I was puzzled, and wondered if this rescue was actually necessary.

Then I found another video on YouTube that was related to this helicopter rescue. In fact, I recognized the hiker (Annie) telling the story using finger puppets, so I had to check it out:

Well, I guess that answers my question about why the hiker was rescued. I guess that's a legitimate reason, eh?

Props to the Riverside Mountain Rescue Unit for doing what they do. Keep up the good work!

Friday, September 16, 2011

I Will Complete the PCT in 2011!

38-miles to go. That’s all I have to hike to complete my 2003 Pacific Crest Trail hike and the Triple Crown. I embark on that 38-mile adventure today to finish these two milestones. Thank God. For eight years, these last 38-miles have been a haunting reminder that I am not done with the trail. Every year I attend Annual Day Zero Pacific Crest Trail Kickoff (ADZPCTKO), I see pictures of smiling hikers at Monument 78 at the Washington-Canadian border, and feel frustrated. I’ve not been there yet.

Conditions at Devil's Park in 2003
In 2003, my hike on the PCT was re-routed through the Devil’s Park area of the Wenatchee Wilderness, since the trail was closed from Rainy Pass to Hart’s pass. The only map I had of the area was the free, colorful North Cascades National Park map I got in Stehekin, WA, and it was useless in snowy conditions with limited visibility. I had also made a commitment to be in Seattle, and I had no time to kill a day waiting for the weather to clear, so I bailed on my thru-hike attempt.

I am resuming the hike where I left off: at the Devil’s Dome Loop trailhead. Yes, I am continuing on the re-route from 2003, as I will hike up the Devil’s Dome Loop to Devil’s Pass. From there, I will head east through Deception Pass, and reconnect with the PCT at Holman Pass, where I will make the run toward the border. After I get to the border, I will turn around, and hike south on the PCT all the way to Stehekin, where I will catch the ferry to Chelan. From there, I head to Wenatchee, WA to receive my Triple Crown award at the ALDHA-West Gathering.

The time has come for me to complete this hike, and I will complete it. I have a very detailed Trails Illustrated map (on loan from Chigger!) of the area, better equipment, wit and wisdom from hiking the CDT, and a bitchin’ attitude that I am going to get this thing done.

Weather Forecast for the Next 5-Days... Yikes
The weather is looking like crap again. As in 2003, mid-September is looking really “iffy.” Highs will be in the mid 50’s and lows in low 30’s with precipitation forecasted every day. I figure that if the weather gets really bad, then I will head toward Ross Lake, and complete the trail on the north end of that lake. However, that’s a really bad weather scenario, and I certainly hope to avoid that.

I will be checking in from the trail through my Twitter feed, and I hope to write a more detailed account when I get to Wenatchee.  Until then, Happy (and snow-free) Trails!